Tuesday, February 26, 2013

Germinating Oak and Pine at Snow Mt. Ranch


                   Germinating Gerry Oak 
                     and Ponderosa Pine 

                       at Snow Mt. Ranch


                              Garry Oak Stand, Windy Point, photo by Kristin Hiler


This post is a cursory blurb about the efforts of Cowiche Canyon Conservancy to return Ponderosa Pine and enhance existing Garry Oak stands at Snow Mt Ranch.  
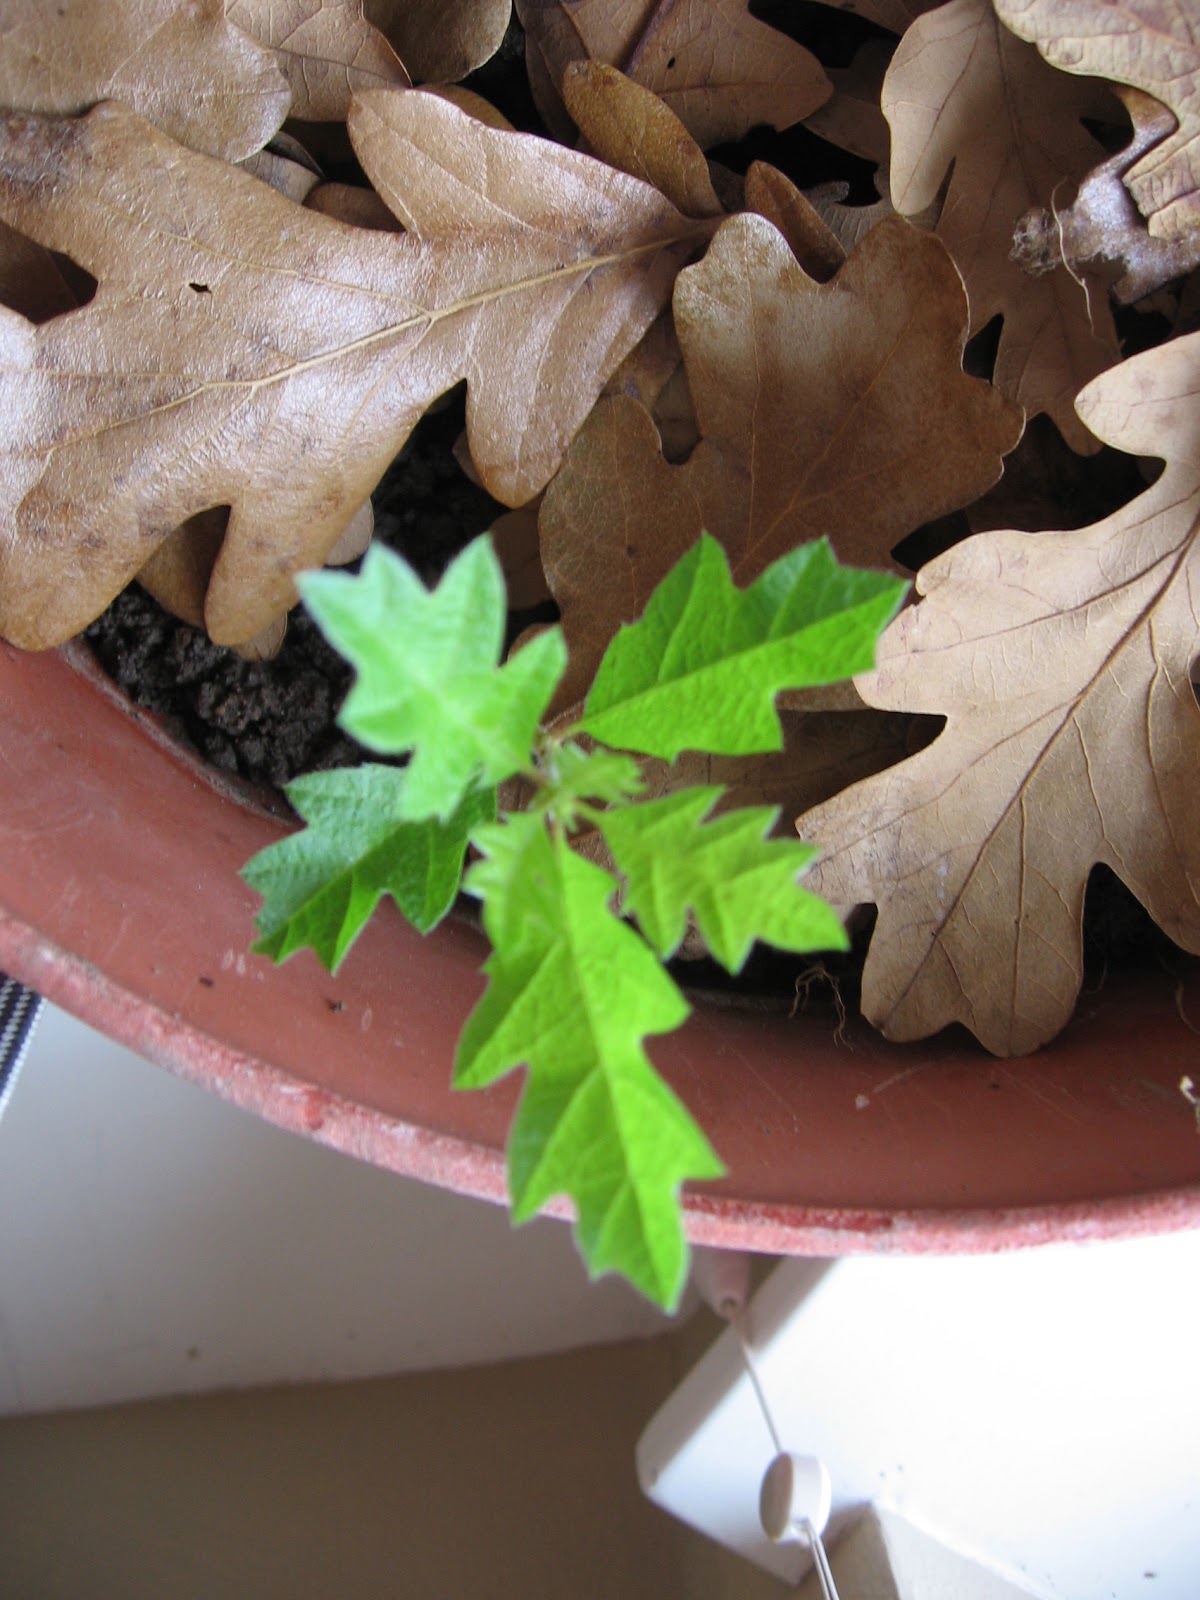

Garry oak seedling

Indicated by Ponderosa stands in the Cowiche Canyon and directly west of Snow Mt Ranch, it seems logical that scattered Ponderosa Pine once extended through the riparian zones in these areas.   At present there are 33 individual Ponderosa Pine trees throughout Cowiche Canyon which are apparently natural (based on where they are located).  This thin stand was probably well established in the Canyon when the Railroad was constructed there around 1905 and the density of the stand in the Canyon is probably near to what it was in 1900.   In an effort to re-establish Ponderosa to the riparian zone at Snow Mt. Ranch, volunteers have planted Yakima county seedlings along the creek there.  These trees are now 4 - 5 yeears old.  


Cowiche Canyon Ponderosa Pine Tree, photo by Jo Miles

It is estimated that some 60 seedlings have been planted along the creek (at the ranch).  Many were destroyed in the 2010 fire, an anomoly since P. pine is a fire dependent species, but nonetheless.  At present volunteers can identify 5 of these trees which are still growing.  All of the trees have been subjected to comprehensive physical damage, probably from Deer and elk.  It is estimated that their root systems are healthy or they would have perished.  Here is an example of those trees. 


Struggling Ponderosa in Umptanum Canyon, photo by Matt Dahlgreen

This tree (at Snow Mt Ranch, below) is over 4 feet high and doing well, EXCEPT for the massive rubbing and nibbling on the trunk.  It is guessed it will either survive as is or the lower branches will bush out and up. Judging by the adjacent oak, if this tree can eventually reach a height of 8 feet it will probably survive. 


Garry Oak:  Garry Oak is sustaining loss at Snow Mt Ranch where the beaver are moving their ponds out from Cowiche Creek.  This is a natural result of the Conservancies efforts to return this area to the natural condition and is expected.  However, this trend may move faster than the Oak are accustomed to moving.  We are therefore seeking a way to (in the short term) help the oak to migrate outward with the changing water table.  Once that is completed, the oak should be able to give and take with the beaver in a natural system.

 Cut and drilled tubes ready for the dibble

The garry oak project is based on the fact that we have lots of acorns and not much money to complete this (what should be simple) project.  Therefore, our efforts are based on a simple method based on the principals of natural regeneration.   We simply want to mock the natural process, get the oak stands moving outward, and then let them fend for themselves in a natural system.  Rich Haydon has volunteered a lot of time to keep me in line with this project (science based) and his expertise is truly appreciated.  However I doubt if  he'd stand behind all of my foolishness as follows: 

The acorn doesn't fall far from the tree

We decided to harvest acorns after they fall (October) and directly dibble them into outward edges of the moving riparian zone.  We are trying four of these dibbles this year.  Starting with a 4 Inch plastic tube (for protection and identification), we dibble an acorn in a suitable area, and install an 18" mulch cloth for further  protection.   Here is one of the three dibbled acorn sites with ground cloth and brush for protection.  The green flag is for identification. This tube has been "dibbled", or do we say, "acorned?"  


If anyone wants more pictures I have all three (plus a fourth control site) photographed.  Here is another dibbled tube: 


Now, all we have to do is monitor the plant sites in the spring and possibly water them once or twice in late summer.  All plant sites are 10-40 feet from the creek.  If we get 50% mortality, we can assume 1 or 2 of these acorns will not survive the winter.  In that case we'll re-dibble them next October and the process starts again. If we feel we are on the right track we'll try to talk Betsy into adding three plant sites next fall.  Options discussed are to soak the acorns before dibbling, introducing a nutrient to the plant sites, and offering some physical protection if needed.  We may shorten the planting tube, AND, we'll remove it from any tree that reaches the second year.  Split tubes have been discussed as an  option.  After observing the small oak in the area, it seems that oak gets it's start in a small grove of juvenile trees, which as a group fight their way to 4 or 5 feet, then one dominates and the others die.  The physical damage to young oak at Snow Mt is extensive, but they seem to produce a survivor occasionally on their own. 

Arent' these little oak cute!  I am wondering if they would make good residential landscape trees in Yakima.  They require little water, seem hearty, grow slowly, are relatively strong, and occasionally, when mature, host natural honey bee colonies in their hollow trunks.  And, you get acorns.  


Thanks Rich, 
Any suggestions folks? 


Ceramic Jars


                                   Ceramic Jars


There is a bit of misunderstanding about the Raku ceramic process and Smoke Fire process and how they differ.  I want to show three jars which illustrate the differences. 


This is a raku pot.  The low fire green and white glazes went on, then fired, then back into a Raku kiln, and pulled out red hot and dunked in leaves.  Then the jar body washed and  waxed.  The Raku glaze is brittle and cracks easily when stressed in the firing, thus the crackle pattern on this jar.  The black areas are bare clay surface.  In the reduction, created by putting hot pots into leaves, these areas (unprotected by a glaze) are blackened.  The interior of this pot is bare, unburnished ceramic though the clear lip glaze extends down into the pot an inch or two.  (size 10" X 8"): 


This smoke fired jar was covered with a red slip, burnished, bisqued, glaze added, then thrown into a smoke fire barrel and smoked.  The lip was protected by glaze.  The smoke gives the surface a darker, mottled finish.    This jar has a smooth, functional interior glaze and would hold liquids, though is probably not suitable for kitchen use.  This jar is 10" X 8":


This jar (below) was bisqued and painted panels and designs added to the white slip surface, then the panels were covered with a clear glaze and fired, then it went in a smoke fire barrel, cooled, cleaned and waxed.   This jar is not typical of a lot of smoke fires ware.  Size is 10" X 8": 


Tuesday, December 4, 2012

Building a work table for a Ceramic Studio

Building a Work Table for a Ceramic Studio

This is not the workbench you want for a ceramic studio.  It is a piece of plywood balanced on top of a bar stool.  At least I got to the point where I could work and balance at the same time,,, however that is not the purpose of a work area (or a bar stool). 


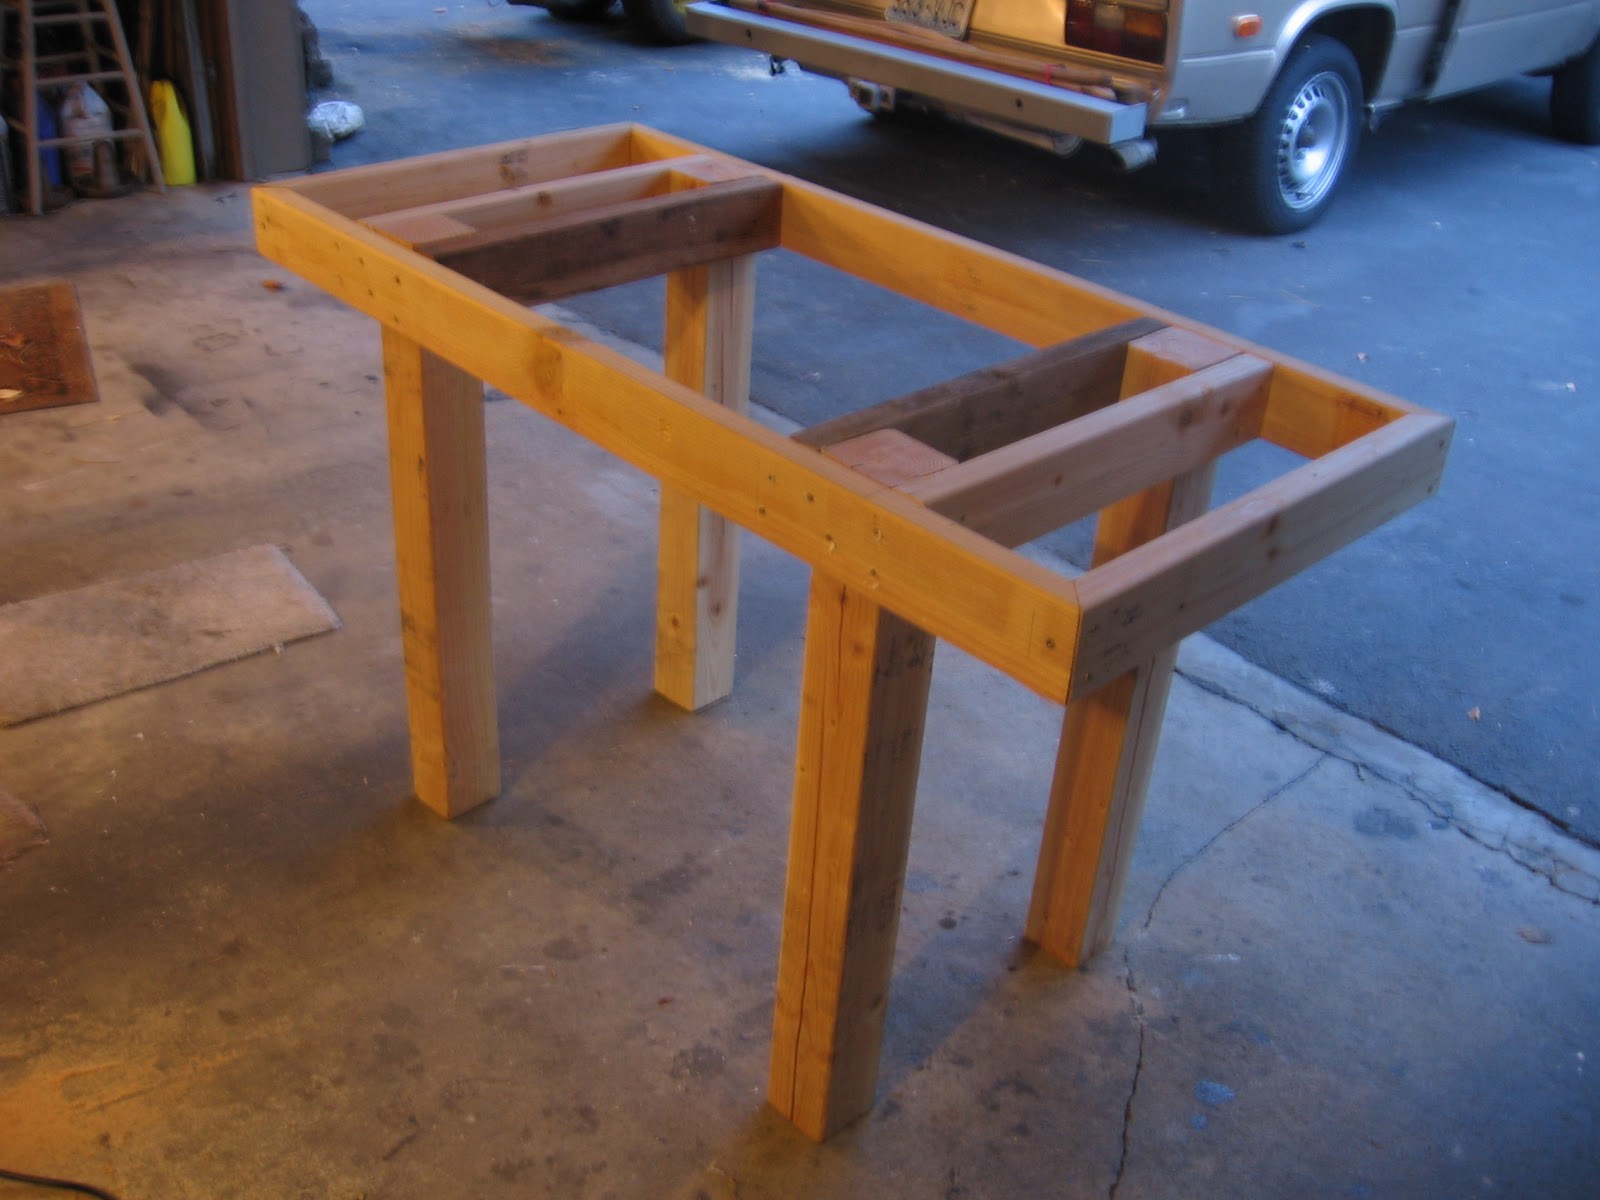
There was no way around it, I needed a sturdier table top.  Step one: visit a lumber store and get some 2X4s and 4x4s.  I wanted a strong table that was easy to build.  Let's follow the progression: 


I cut the 4x4s 32 inches long.  I cut the top to accept my piece of plywood.  The corners are mitered and it is completely screwed together with long construction screws.  Here it is assembled in my garage.    Want a closer look: 


This side view shows how each leg is screwed into the table frame from three sides.  This makes the legs quite sturdy without additional bracing and allows me to work up close to the table on all sides.  I'm going to say you could park a VW bug on top of this, "If you can find a place to stand".  Here is another view:


Here you see the frame in my studio, ready for a top.  You can see the hollow spaces in the frame.  If you screwed a plywood "bottom" on one of these openings you could pour plaster of paris into it and make a good wedging batt for working-up clay.  As I work mostly with prepared clay and slabs I don't need a wedging batt (a canvas covered board works for my purposes).  Yes, that's my pack saddle in front.  I packed a bit with a wonderful white donkey named Boulregard but he has gone to his just reward, and I'm guessing he had to cross a creek to get there. 

You can see my slab roller and studio behind.  


Top screwed down, covered with beaverboard, smooth side up.  This was once the kitchen counter top of Krisitin and my cabin at Trout Lodge, then my writing table there, then a mouse house in a garden shed for 30 years, and now works great for this top.  Sure glad I kept it.  This shows it scootched up to the front of my clay slab roller, a great working arrangement for making slabs.  I put felt floor protectors on the bottom of the 4x4 legs and the table scootches great on concrete. 

It easily scootches up to my studio work table also, and that's the way I'll use it most of the time.  


Awesome!  Higher than the work table, lower than the slab roller.  If anyone is curious my kilns are under the eve on our garage porch.  Front bottom left you see three "ceramic paintings".  

Well, so much for studio work tables.  I suppose I could have carved legs out of logs but this works good for now. I cut all the lumber on Krisitin's "Cut off saw", but if the 4x4s had been an mm bigger it wouldn't have worked.  Lesson: only buy a cutoff saw that will cut 4x4s.  Being completely constructed with screws I can technically take this table apart (not sure why).  My plan was that one leg was going to come out a bit crooked so I planned to unscrew it, shim it straight, and retighten it.  However, my plan failed and all the legs came out parallel.  Imagine my disappointment.  

I promised a book review of C. E. Rusk's "Tales of a Western Mountaineer" but his words are so unique and poiniant that I simply put quotes end to end, then realized that is some sort of plagerism.  Until I get that figured out (get permission from the Mountaineers???) I'll have to find something else to blog.  And don't forget, "Friday the 13th" comes on a Thursday this month, compliments of Rik Smith pointing that out, compliments of "Pogo" saying it.   Thanks Rik!!!


Monday, October 29, 2012

Seven Steps to Oblivion


Seven Steps to Oblivion 

(reflections off a rock)

Photo by Jo Miles: Jumpoff lookout with distant smoke

 Seven steps to oblivion.   

You climb the seven steps up to the
old cabin, step on the catwalk,
enter the door.  All is as it was, now
You hear the wind through the guy wires,
The wind around the corners,
And over the top
Of this strong old relic.

     The breezes and the cooling
Against the sun through glass
     Balancing a cold planet
   Against what heat
 Can be captured
     From the afternoon.

This is the code of planets
      Circling the night sky
           Circling the crystalline Orbit./mh


Tieton Sky/ mh

And, looking down river, October 2012
                                                              Tieton River/ mh


Monday, October 22, 2012

Book Review: East Of The Divide


Book Review: "East of the Divide" by Chester Marler


 Photo by Matt Dahlgreen

“East of the Divide (Travels through the eastern slope of the North Cascades, 1870-1999”, by Chester Marler: North Fork Books, 2004- Leavenworth, WA 98826.

Photo by Tom Hulst

 The East Slope of the Washington Cascades, running north from the Columbia River to Canada is a large, rugged mountainous zone that, along with it’s foothills and river basins, has generated a lot of classic mountain literature.  Standing in my bookshelf is a number of books of exceptional quality that includes the historical meandering and mountain lore of Fred Becky, the classic 1880 -1931 mountain reminiscence by Claude Rusk “Tales of a Western Mountaineer” and the early memoirs of Supreme Court Justice William O. Douglas, (“Of Men and Mountains”) who followed his boots and thoughts from 1917 up to 1951.  All of these books are worth rereading time and again and they are the pillars on which we measure our own mountain walks. 

Winter Waterfall, Cowiche Canyon, photo by Jo Miles

 In 2004 North Fork Books in Leavenworth released Chet Marler’s “East of the Divide”, a unique book in it’s own right that carries the conversation started by earlier mountain pioneers and writers to the next level.    Marler’s book is a lot like hiking with a friend, and the familiar sounding narriative articulates thoughts about place, setting, relevant history, and human use, all in an even and thoughtful voice. 

Shellrock Peak, photo by Jo Miles

 Disguised as a wandering trail guide and historical review, the book calls on just about every whistle stop that one would expect from a long hike with a friendly Wilderness Ranger.  Every page has hidden gems, all too numerous to mention; insight into  place, approaches to reading the setting, and thoughts about “the edge”.  Examples include : “Serrated skyline,,, where I naturally became immersed in the details of the landscape… in the mountain not everything of value is spectacular, imposing, or overwhelming….even a struggling white bark pine growing in a rocky outcrop, or a grouse making its mating  call can become starting points in perceiving the complexity and beauty of the natural world…..something that survives that long (a giant Larch)  gives us a different sense of time, changing our perspective of place and process……scramble trails”, and etc. 

Lookout Outhouse, photo by Jo Miles

 Likewise, the mention of Old Fire Lookout views, abandoned single strand phone line insulators,  hollowed-out mountain goat beds, a photo of the old cabin at Spanish Camp, Sheep herder trails and travelways, Trail blazes, and the host of similar details bring the hiking stories alive and gives us tie points to cross check our own pedestrian rambles. Who, for example, will know in 100 years that some pack horses are better than other pack horses or understand so well what that really means (p. 190) without Chet’s kind words. 

Ross Lake from Desolation, photo by Kristin Hiler

 Much like Walden, this is a book about seeing, expressed in the context of long walks.  What it imparts is the casual, understated poetry of the measured narrative responding to alpine setting.  Modern mountain poets would do well to dip from these pedestrian rhythms and patient observations/mh.

Man examines tree: photo by Matt Dahlgreen

A few more words:  Chetster Marler also has a book out by Wolverine Press, titled, "Snow and Spire".  The photos on the attached link to a "Snow and Spire" review look great!  The link to information about that book is:  http://www.justgetout.net/Wenatchee/23241
Just click on the link above and you can see photos.  


Friday, October 12, 2012

News from Jumpoff Lookout

-


News from Jumpoff Lookout

Here are some pictures of our efforts to winterize Jumpoff Lookout.  We have now pretty much closed in the cabin from winter snow and made notes on what else needs to be done in the future to assure building protection.  I'll present photos here with notes. 

East Side: We put in a new plexiglass window in the opening and a new shutter on the end, this side all tight.   


South side: Looks Ok, ( see the cover shot above)  all tight, now lets look at the North side: 


Here you see the new plexiglass window, installed on the shutter and Jo Miles tightening down a shutter that was in place.  These windows gives more light inside and hopefully will discourage visitors from pulling off shutters.  We want to come back with the proper shutters in the spring, but this should keep out 90% of the snow this winter.  Winter snow piles up inside when the shutters are missing, resulting in floor rot.  We want to stop or eliminate this damage to the lookout floor. 

Below is the West side which has  some small holes, behind glass,  but it will also survive another winter.  We'll make this tighter next summer. 


We now plan to cut two narrow shutters for the last two "unshuttered" windows and replace the plexiglass on the west side.  Right now everything is covered and the building is snow tight.  

Inside the cabin are some derelict, but original build-in furniture.  Let's take a look.  This is the fire finder post.  It's solid and ready for a fire finder, but some sanding and a coat of varnish should help it some. 


These pieces of built-in furniture are original but damaged.  My thought would be to remove them, and have a Yakima Cabinet shop do the repairs, then return them to the lookout.  You can here see the floor covering is coming off and the floor littered with broken glass and litter 


and here are two interior pictures showing how much light the plexiglass panels give to the interior, hopefully they will discourage panel removal by visitors. 


We looked it over and think the next project is to clean out all the broken glass, crap and broken-up modern floor covering  from the floor (and remove from the site) to make it appear clean and  cared for.  This heavily damaged modern  "lanoleum" now only serves to hold moisture and damage the old floor.  Once the floor is clean and the litter removed we can start to think about repairing the cabinets (and windows)  and formulating future projects.

This project would not be possible without volunteers.  I first of all want to thank those who replaced the roof a year ago, and for now I want to thank Jo MIles: Driver, photo editor, and repair specialist.  A huge THANKS to you JO! 
6 hours and ready for winter.


And here is our view looking west up the Tieton Basin as we depart for home.  This  view shows why we care about this lonely old lookout station, the last remaining lookout building in Yakima County. 


For now, Please join the National Forest Fire Lookout Association and do what you can to restore the last remaining old lookouts in the Northwest.  More later/mh